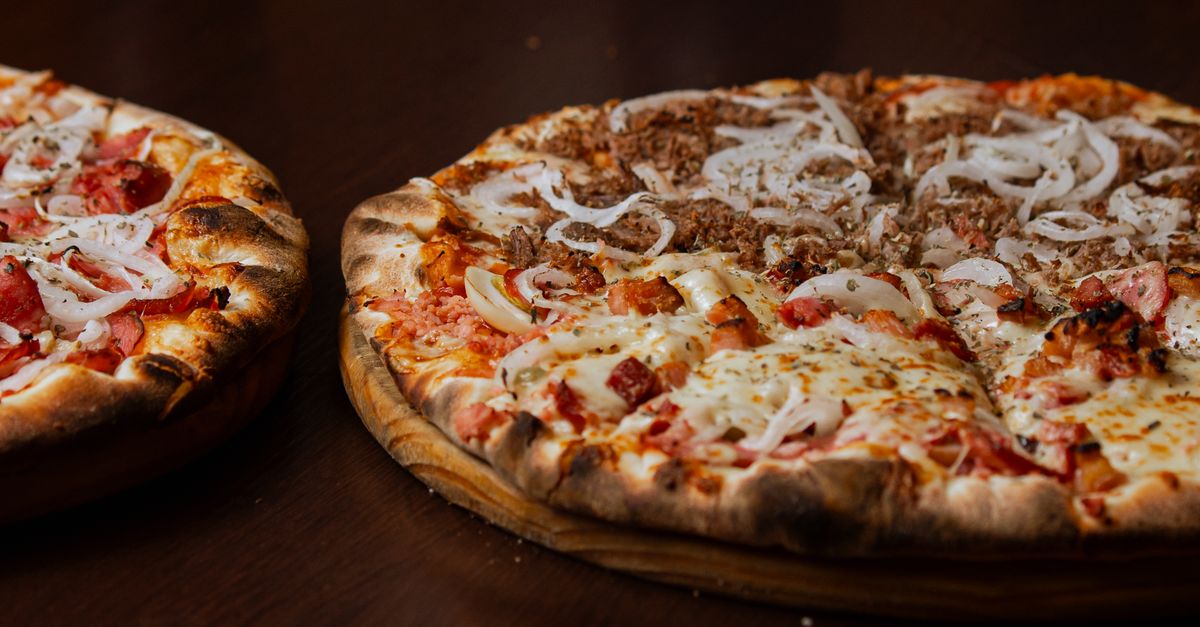
Why Is My Homemade Pizza Crust Not Crispy?
You’ve spent the afternoon making dough, carefully kneading and proofing it, anticipating that perfect homemade pizza night. The toppings are ready, the oven is preheated, and the aroma of baking pizza fills your kitchen. But then, it comes out: beautiful golden cheese, perfectly cooked toppings, and a… decidedly soft, sometimes even soggy, crust. It’s not burnt, it’s not undercooked, it’s just not that satisfying, crispy crunch you crave from a pizzeria.
I’ve been there more times than I care to admit. For years, my homemade pizzas were a delicious but texturally disappointing affair. I tried different recipes, higher oven temperatures, even fancy pizza stones. Yet, that elusive crispness remained just out of reach. In my experience, the mistake I see most often isn’t about the recipe itself, but about a series of subtle missteps in technique that, when corrected, fundamentally change the outcome. What changed everything for me wasn’t one magical trick, but understanding the interplay of heat, moisture, and dough structure at every stage. This isn’t about buying expensive equipment; it’s about mastering a few key principles that will elevate your homemade pizza from good to genuinely outstanding.
Key Takeaways
- Ensure your dough is properly hydrated but not excessively wet to achieve a crisp crust.
- Preheat your oven and pizza stone or steel for at least an hour to create intense, sustained heat.
- Minimize topping moisture and avoid overloading your pizza to prevent a soggy base.
- Use a high-quality pizza stone or steel and a peel for efficient transfer and optimal heat distribution.
Optimize Dough Hydration for Maximum Crispness
When most people think about a crispy crust, their mind immediately goes to oven temperature. While temperature is crucial, it’s only one piece of the puzzle. The first, and often overlooked, factor is dough hydration. Too much water in your dough, and you’re fighting an uphill battle against steam that wants to soften your crust from the inside out. Conversely, too little water can make the dough tough and hard to work with. The sweet spot, in my experience, is typically a hydration level between 60% and 65% for a classic Neapolitan-style or New York-style crust. This means for every 100 grams of flour, you’d use 60 to 65 grams of water.
The real trick here isn’t just following a recipe’s exact hydration percentage, but learning to feel your dough. Factors like flour type and even ambient humidity can affect how much water your flour absorbs. During the kneading process, aim for a dough that is tacky but not sticky. If it feels too wet, resist the urge to add large amounts of flour. Instead, add a tablespoon at a time, incorporating it fully before adding more. What changed everything for me was realizing that a slightly drier dough, one that was still pliable but held its shape firmly, consistently produced a crisper crust. This careful control of moisture from the very beginning sets the foundation for a truly exceptional pizza.
Supercharge Your Oven’s Heat Capacity
This is where many home cooks fall short, not because their oven can’t reach high temperatures, but because they don’t give it enough time to fully heat up. A typical home oven might signal it’s reached 500°F (260°C) in 15-20 minutes, but that’s just the air temperature. For a truly crispy crust, you need sustained, intense heat that mimics a professional pizza oven’s floor. This is achieved through proper preheating of your pizza stone or steel.
In my kitchen, I now preheat my oven to its maximum temperature (usually 500-550°F or 260-290°C) with the pizza stone or steel inside for at least one hour, and often 90 minutes. Place the stone on a rack in the upper third of your oven; this ensures that as the top of the pizza cooks, the bottom gets a powerful blast of direct heat from the superheated surface. The goal is to transfer the pizza onto a surface that is as hot as possible, immediately initiating crust development and preventing sogginess. A common misconception is that a pizza stone is enough. While good, a pizza steel retains heat even better and transfers it more efficiently, leading to a superior crisp. This long preheating time is non-negotiable for achieving that coveted crunch.
Master Topping Management: Less Is More
It’s tempting to pile on all your favorite toppings, but an overloaded pizza is almost guaranteed to result in a soggy crust. Every topping contributes moisture, and if there’s too much, it steams the crust instead of baking it. This is a hard lesson I learned myself: my early pizzas were often laden with too much sauce, cheese, and vegetables, turning the bottom into a damp, unappetizing layer.
The key is mindful topping selection and application. First, go easy on the sauce. A thin, even layer is all you need. If using fresh mozzarella, consider tearing it into smaller pieces and allowing it to drain slightly on paper towels before placing it on the pizza. For vegetables, pre-roasting or sautéing high-moisture options like mushrooms, onions, or bell peppers can draw out excess water, concentrating their flavor and preventing them from releasing liquid onto your crust. In my experience, less is always more when it comes to toppings. Aim for balance: enough to be flavorful, but not so much that it compromises the crust’s integrity. What changed everything for me was shifting my focus from ‘how much can I add?’ to ‘how little can I use to still make this delicious?’
The Transfer Technique: Speed and Surface Matter
The moment your pizza transitions from your prep counter to the screaming hot stone is critical. Any delay, or an uneven transfer, can lead to heat loss and an irregular bake. This is where a pizza peel becomes your best friend. A wooden peel dusted generously with semolina flour (which acts like tiny ball bearings) is ideal for preventing sticking and allowing a swift, smooth transfer.
Before you even think about putting toppings on, ensure your stretched dough is on the floured peel and moves freely. Give it a gentle shake to confirm it’s not sticking. If it sticks, gently lift an edge and add more semolina. Speed is of the essence: once topped, you want to launch the pizza onto the preheated stone with a confident, quick motion. Don’t slide it slowly, as this can cause the dough to fold or stick. A quick jerk of the peel, almost like pulling a tablecloth, is the technique I rely on. The goal is for the pizza to hit the entire hot surface simultaneously, ensuring an immediate, even sizzle on the bottom, which is vital for crust development. This efficient transfer minimizes temperature drop and maximizes that initial blast of heat the dough receives.
Finish Strong with Strategic Broiling (Optional but Effective)
Even with optimal dough, intense oven heat, and careful topping management, sometimes the very top of the crust or the cheese needs a little extra love to achieve that perfect golden-brown, slightly blistered finish. This is where the broiler can come into play, but it requires careful timing and vigilance.
In my own pizza journey, I found that turning on the broiler for the final 1-2 minutes of baking can make a significant difference, especially if the top of the pizza isn’t as browned as I’d like, but the bottom is already perfectly crisp. This is a very quick process, so you must watch it constantly. A minute too long, and you go from perfectly browned to burnt in seconds. The high, direct heat from the broiler caramelizes the cheese and can add that final touch of crispness to the crust edges without overcooking the base. However, this is an optional step, best reserved for when your pizza is nearly done and just needs that final aesthetic and textural push. It’s a tool for precision, not a fix for a fundamentally undercooked pizza.
Frequently Asked Questions
Can I use a baking sheet instead of a pizza stone or steel for a crispy crust?
Using a baking sheet can produce a reasonably crispy crust, but it won’t be the same as a pizza stone or steel. Baking sheets don’t retain heat as well, nor do they transfer it as efficiently or intensely to the dough. If a stone or steel isn’t an option, preheat your baking sheet in the oven for at least 30 minutes before transferring the pizza onto it to maximize the initial heat.
How can I prevent my pizza dough from sticking to the peel?
Dust your pizza peel generously with semolina flour, cornmeal, or even regular flour. Semolina flour works best because its coarser texture acts like tiny ball bearings, allowing the dough to slide easily. Make sure the dough moves freely on the peel before adding toppings, and work quickly to transfer the pizza to the oven once topped.
What kind of flour is best for a crispy pizza crust?
For a classic crispy crust, a strong bread flour or a ‘00’ pizza flour is often recommended. These flours have higher protein content, which develops gluten structure and can withstand the intense heat, resulting in a chewier interior and crisper exterior. However, a good all-purpose flour can still yield excellent results with proper technique.
My crust is crispy on the edges but still soft in the middle. What am I doing wrong?
This usually indicates that your pizza stone or steel wasn’t hot enough, or your toppings contained too much moisture. Ensure your oven and stone/steel are preheated for at least 60-90 minutes. Also, reduce the amount of sauce and high-moisture toppings, or pre-cook them to remove excess water.
How thin should I stretch my pizza dough for a crispy crust?
For a truly crispy crust, aim for a relatively thin stretch, especially in the center. The edges can be slightly thicker to create a nice, airy ‘cornicione’ (crust rim), but the base should be thin enough to cook quickly and prevent sogginess. Practice is key to finding the right balance of thinness and structural integrity.
Can I add oil to my dough for a crisper crust?
Yes, a small amount of olive oil (typically 1-2 tablespoons per dough ball) can contribute to a crisper crust, as it helps with browning and creates a more tender interior. However, too much oil can make the crust dense and greasy, so use it sparingly and ensure it’s balanced with proper hydration.
Achieving that perfectly crispy homemade pizza crust isn’t about expensive gadgets or secret ingredients; it’s about understanding and controlling the fundamental elements of baking: heat, moisture, and dough. By optimizing your dough’s hydration, supercharging your oven’s heat, being mindful of your toppings, and mastering the swift transfer, you’ll consistently bake pizzas that rival your favorite pizzeria. It took me years of trial and error, but focusing on these core principles finally transformed my pizza nights. Start with one adjustment at a time, pay attention to the subtle cues your dough and oven give you, and soon you’ll be pulling out pizzas with that satisfying, golden crunch. Your next step? Experiment with a slightly lower hydration dough and a longer preheat, and taste the difference for yourself.
Written by Clara Jenkins
productivity and home organization
A former elementary school teacher, Clara brings a knack for simplifying complex ideas into digestible steps.
You Might Also Like
The 20-Degree Rule for Home Heating and Cooling: Why Most Advice Misses the Mark
Discover why the common 20-degree rule for home heating and cooling often fails. Learn the strategic adjustments for real energy savings and comfort.

7 Reasons Your Smart TV Feels More Frustrating Than Fantastic
Smart TVs promise seamless entertainment, but often disappoint. Discover 7 overlooked reasons your TV is frustrating you, and how to fix them.

A Beginner's Guide to Thoughtfully Evaluating Online Reviews for Products
Learn to cut through online review bias and find genuinely useful product insights. Discover common pitfalls and how to spot authentic feedback.